
Most people wonder how it could be that making home made soap is cost or time effective. Marianne Hatch, Milton, is a wife and mother of two and has been using her own soap, a handed down family recipe for years. Hatch said soap making is surprising to many at how little was actually involved, as there are only 4 main ingredients which include Olive Oil, Coconut Oil, Water & Lye. Hatch said it is possible to add any fragrance oils of choice. She said her favorite fragrance combination is Sweet Orange, Rosemary, Eucalyptus, and Clove Bud. Hatch said her youngest son was born with sensitive skin.
“With every soap we tried he continued to have breakouts and dryness of skin. I would even purchase organic soaps," she said. It was costing her family an average of four to five dollars a bar. One Christmas her sister, who had used the family recipe, gave her some of the family recipe. Not only did her son's skin clear up immediately, she also found out she could make this soap for around fifty cents a bar. "We have been using it ever since." said Hatch.
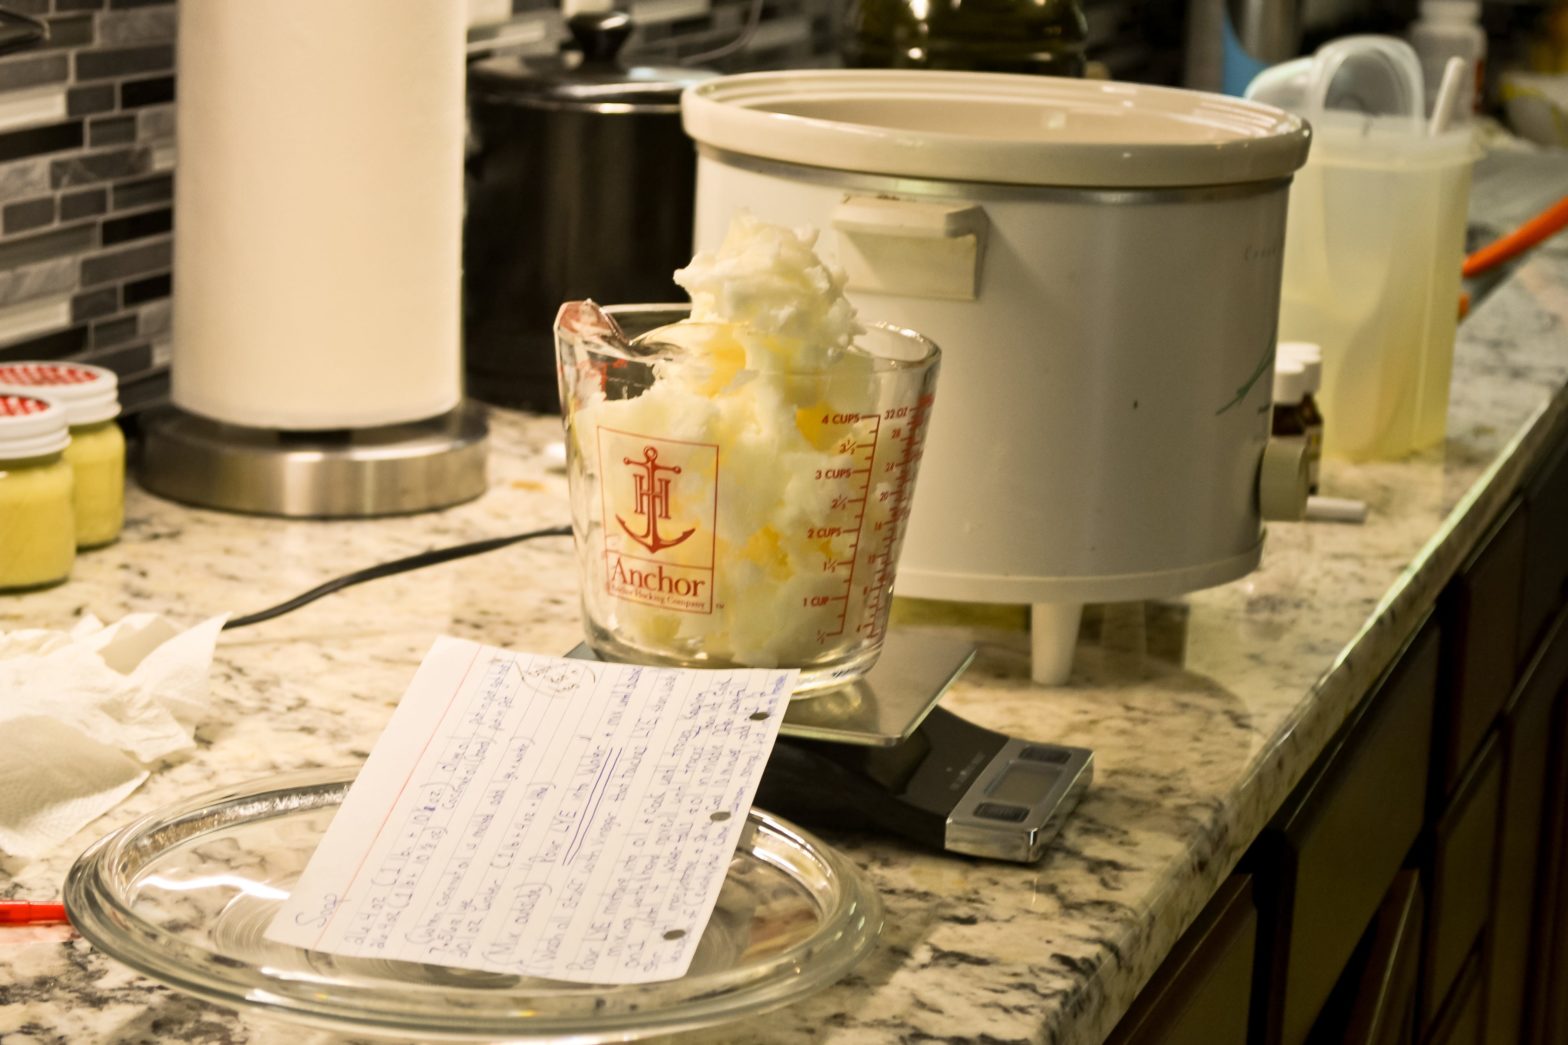
So what does it take to make soap at home? It can really be done in 6 steps. At the Hatch household it starts with a crock pot, a scale and a measuring cup. In step one you will measure and place the olive oil and congealed coconut oil into a heated crock pot to allow it to melt and mix together. Step two she measured and mixed lye. She started by donning a pair of gloves. “Lye is a very toxic and is not to be inhaled or touched as it can burn your lungs and skin,” said Hatch. She said it is preferential to do this step outside in an area with little to no wind, although with caution it can be done at the kitchen sink. “Make sure you only pour the lye into the water and do not do this step in reverse because it could cause the lye to explode,” she said. After she mixed the lye into the water it was time for step three. This was easy because all we did was add the lye mixture to the oils that were warm in the crock pot, and then used a hand mixer to blend it all together well. Hatch instructed to look for signs of what she called tracing, this is when the soap mixture develops lines that follow the mixer. As soon as she seen the tracing occur we were on to step four. Step four was to simply place the lid on the crock pot and wait. It took time for the mixture began to take shape, waiting for it to develop into a waterfall effect. She explained what is called the waterfall effect: the soap mixture begins to boil, and fall into itself, leaving a line of oils in the middle. As soon as this happens, she said it is done. In step five she took a spoon and mixed the soap batter together until it was a mash potato consistency. After step five the project is completed after adding fragrance oils.
In step six it is all about getting creative and forming the soap into bars or shapes. Hatch uses a mold created from PVC pipe. This circular long tube allows her to pour the soap batter into the tube and after drying she simply peels away the pipe and cuts the roll into bars of soap. She usually gets 18 bars of soap from each batch and says it lasts her family of four approximately six months. She said after the soap cures and it begins to harden the process of cutting the soap into squares, rectangles or use any cookie cutter to achieve the desired shape begins.
This article originally appeared on Santa Rosa Press Gazette: 6 Steps to Homemade Soap